Best Practices in Revit® for a More Efficient MWF Project
Whether you are a novice Revit® user or an expert, here are some tips and tricks in Revit® which will help make your framing models and workflows smarter and more efficient.
General:
- Do not remove or rename any delivered families from the MWF installation folder. If any adjustments to families are necessary, copy families out of the MWF folder and modify the copies.
- Do not modify delivered markers; as needed, copy delivered marker and modify the copies.
Note: markers can be exported and imported for use in other projects.
Model Clean Up:
- When possible, prior to panelization, strip Revit® models of elements that are not needed for framing. The bigger the file, the longer it will take to create panels, generate drawings and more.
- Purge models before loading MWF data, and avoid purging projects after. MWF uses many placeholder objects.
Note: any objects or parameters that have MWF_, BIMSF_, Panel.Params in their names are most probably objects generated by MWF and should not be deleted or purged. - For large projects, separate framing levels in individual files, then link these models to a Central File.
Set Visibility in 3D Views:
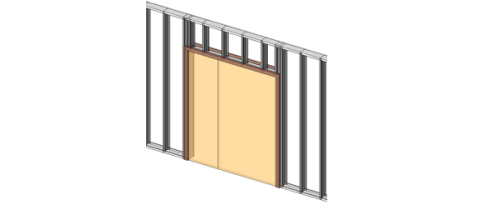
- Transparent walls, floors, ceiling and roofs will allow users to view MWF panels without having to turn these element types on/off multiple times.
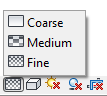
- Medium/Fine detail level – Set Revit’s detail level to at least medium. If set to coarse, framing members will appear solely as thin straight lines. Changing the level of detail to coarse after framing is a suitable approach to keeping your project light.
Prepare Wall Types:
- Create one structural layer per wall type – Place MWF panels centered on the structural layer.
Create accurate geometry (Height, Length, Angle) – Panel members will follow the geometry of walls. - Create properly joined walls – It affects MWF panel joins.
- Do not create stacked walls – MWF will not automatically frame stacked walls.
- Do not create curtain walls which represent panel framing – MWF will ignore Curtain Walls for framing.
- Do not create walls with reveals or sweeps.
- Walls can be attached to roof lines, but their ‘Top Constraint’ should be the correct final height of the panel.
- When framing gable walls, make sure the top constraint is at or above the highest peak of the wall. When using the interference command for clash detection between walls and MEP objects, the objects need to intersect the volumes of the walls, not the “projections” created when walls are connected to roof lines.
- When creating MWF Trusses, the eave walls that will serve as truss supports should not have their top constraints connected to levels higher than the final wall heights. MWF will use walls’ “Top Level Constraint” as the base of trusses. If the top constraints are above the correct location, the trusses will not be framed properly.
- Walls should be split before applying join markers. Since splitting walls creates separate walls with different IDs, join markers won’t be able to identify the correct wall(s).
Verify Door and Window Types:
- Width, Height and Rough dimensions should be accurately represented.
Eccentricity – Place center lines of families in the middle. MWF will frame around the openings based on center lines or middles used as the insertion points.
Create elevation insertion points at the bottoms of window and door openings.
MWF does not support Generic Model Openings. - MWF does not support instance parameters for height and width of doors and windows. These parameters need to be Type Parameters.
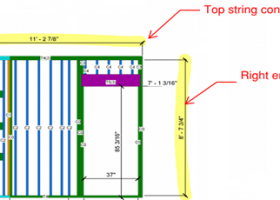
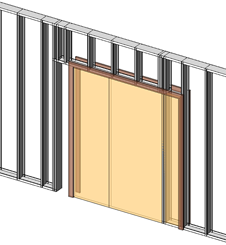
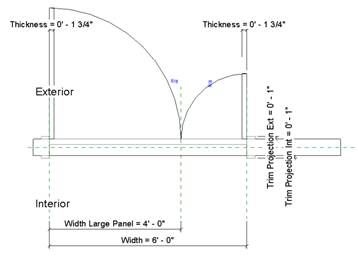
MWF will need these references to create the framing around the doors and windows. The parameters “Width” and “Height” and the location of the reference plane (which defines the origin) will designate exactly where the framing will start and finish.
Below is an example of a door family being framed incorrectly due to the wrong location of the reference plane (which defines the origin of the insertion of the door within the project). This instance shows that there is no center origin. By clicking the Edit Family button, users can adjust and add reference planes. Once the center origin is added and defined as such, the correct framing will be applied:
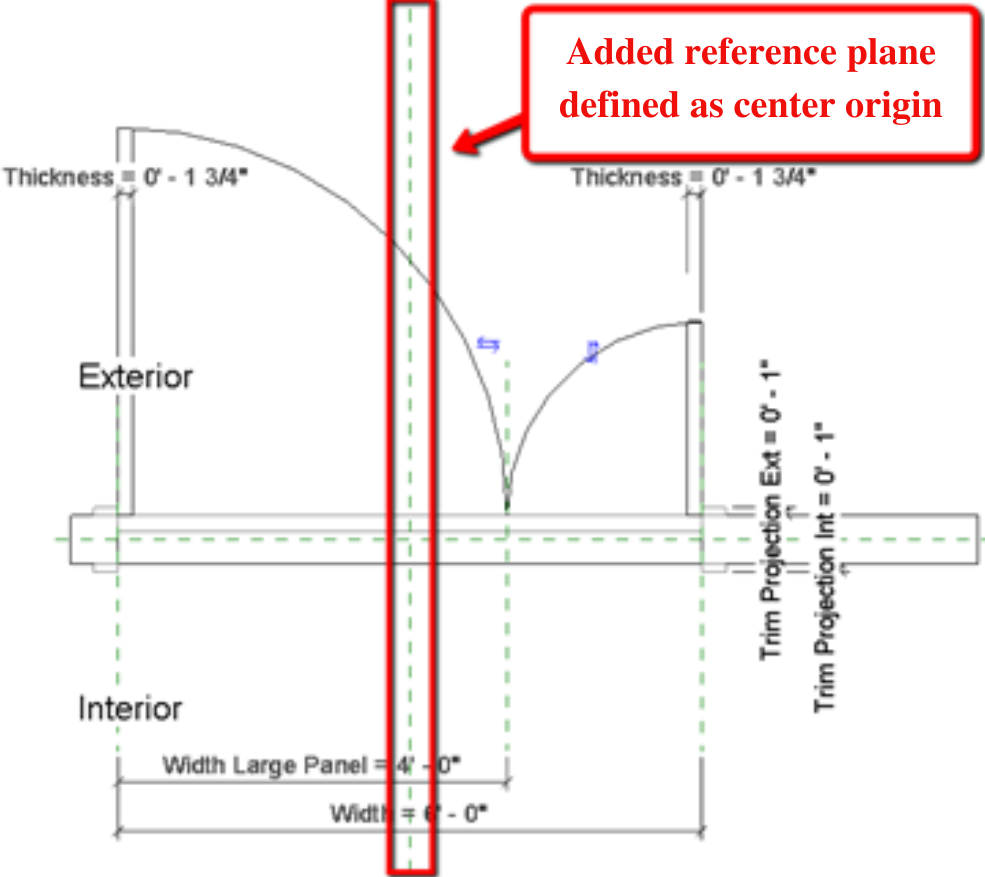
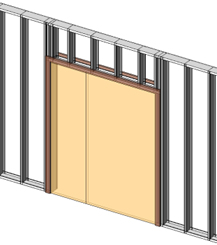
By adding the center origin, the door will now frame correctly:
For MultiLayer Panels:
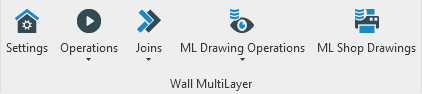
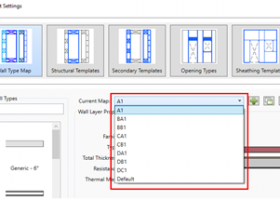
- Always access the properties through Wall MultiLayer > Operation > Wall Properties. Using single layer panel properties on a MultiLayer panel will cause the panel to be corrupted.
- Walls should be split before applying join markers. Since splitting walls creates two walls with different IDs, the join marker will not be able to identify the correct walls after the original walls are split.
Prepare Roof Types for Trusses or Rafters:
- Create one structural layer –MWF roof panels (rafters or trusses) can be aligned to one of the faces of a structural layer.
- Create accurate geometry (Height, Length, Angle) – Truss members will follow the geometry of roofs.
- Walls that will be supporting roofs should not be ‘Attached to Roof’ with Revit®. This might cause the bottom chord of the trusses to be placed at wrong locations.
Prepare Floor Types:
- Create one structural layer –MWF floor panels can be aligned to one of the faces of a structural layer.
- Finish layers – Create the floor object with the correct number and thickness of finish layers. Finish members will be created based upon these layers.
- Create accurate geometry (Height, Length, Angle) – Floor panels will follow the geometry of Revit® floor objects.
- Floors may contain only one closed loop sketch.
Prepare Ceiling Types:
- Ceiling objects should be split per panel before getting framed. MWF is not able to frame multiple panels inside large ceiling objects.
Work Sharing:
- For Single Layer panels:
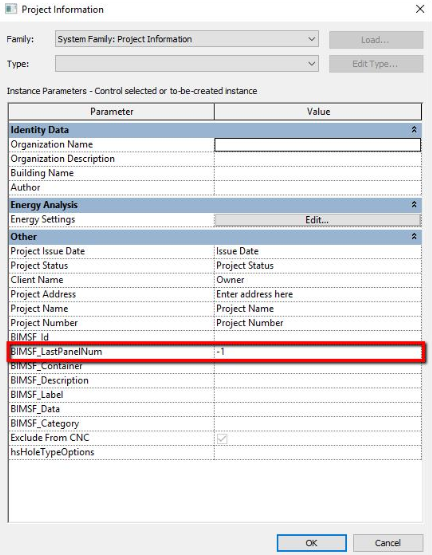
- Multiple users can create single layer panels at the same time on the same workset if “BIMSF_LastPanelNum” in “Project Information” is set to -1.
- For MultiLayer panels:
- MultiLayer objects such as templates or makers should be created beforehand or by a single user when no one else is working on the project.
- Multiple users can create MultiLayer panels at the same time. However, each user should work on a separate workset.
For Floors/Ceiling:
- Only a single user can work with floor and ceiling panels on an individual workset. Other users can still work with other panel types as described above.
- “Elevation Base” of levels should be set to “Project Base Point”. Otherwise, some issues during synchronization may be caused.
Clash Detection:
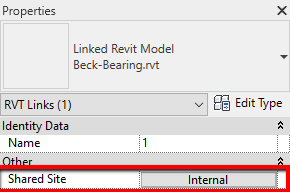
- The coordinates of any linked files which are being used for clash detection should be shared.
- A non-rvt file (IFC, TEKLA, etc.) should be converted to Revit® before being used in clash detection and should contain the project reference levels.
For more information on our products or design services, visit strucsoftsolutions.com/products, email us at info@strucSoftsolutions.com or call us at 514-538-6862.
 StrucSoft Solutions is the market leader in comprehensive Autodesk® Revit®-based BIM framing, with both off-the-shelf and custom solutions targeting the AEC and fabrication sectors. Our star solution MWF simplifies complex Revit® framing with its powerful range of tools for modeling, inter-trade clash detection, custom construction documentation and optional output to CNC machines.