Release features – New MWF Build
It’s that time of year again! Our development team has been hard at work and we’re happy to say that our winter build, version 2.36 (7250) is now available – just in time for the holidays! Head over to your portal page and download the newest version of your MWF module today.
For more detail on each individual feature, register for our free webinar December 11 at either 10AM or 2PM and follow as our team walks you through all of the new features available within the latest build.
Here’s what has been released in version 2.36 (7250):
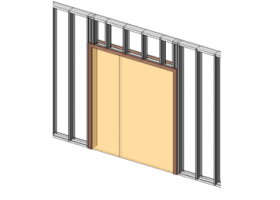
MWF Walls
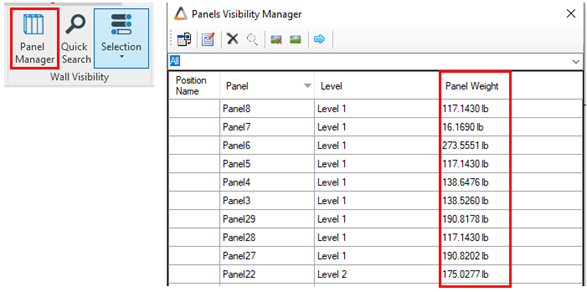
1. Panels weight added to Panel Manager
Panel Manager will now display the weight of all panels listed on the project. Available for all MWF products.
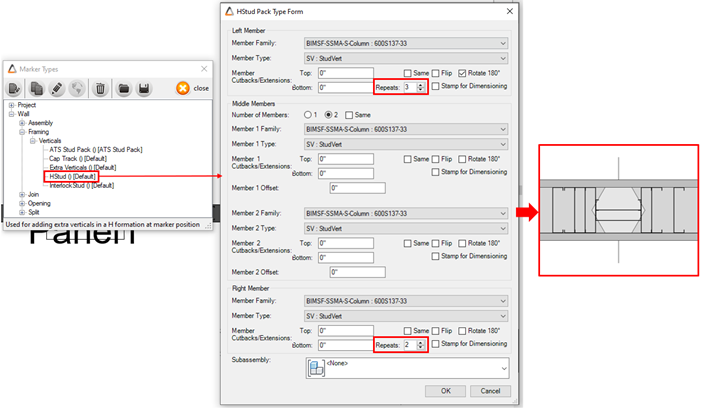
2. H-Stud Marker – Multiple Left and Right Studs
The user has now the option of adding multiple left and right studs to the H-Stud marker. The marker can be found on Marker Manager. Available in all metal products – MWF Pro Metal, MWF Advanced Metal and MWF Pro Suite.
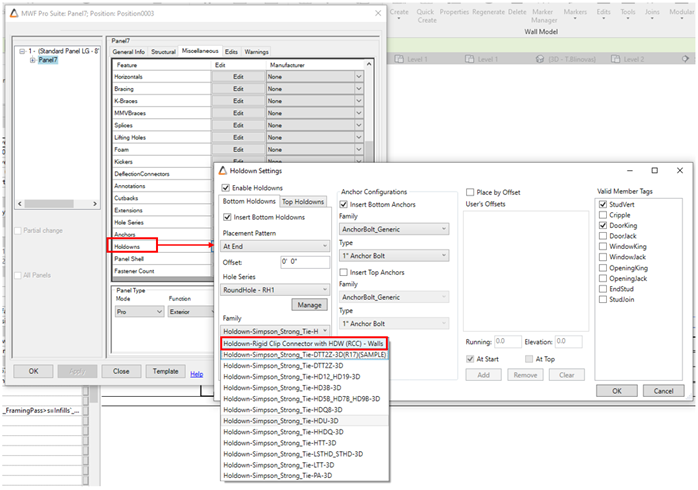
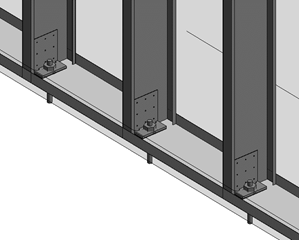
3. Adding RCC Holdown Clip to Walls
RCC Holdown Clip family was added to the Holdown options, on Walls Properties. Available for all MWF products.
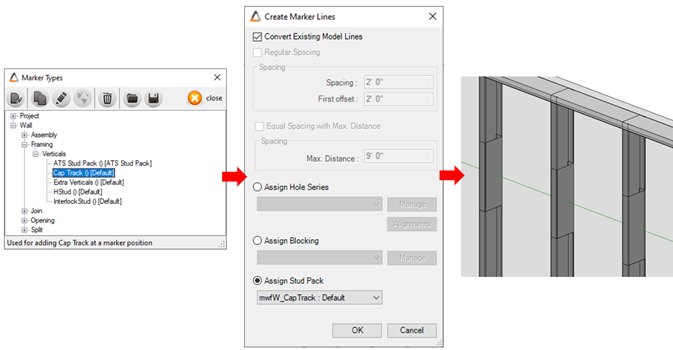
4. Adding Cap Track using Marker Lines
The user can now apply a Cap Track Marker through Marker Lines. The Marker is located under Verticals, on Marker Manager. Available in all MWF products but mainly used for metal.
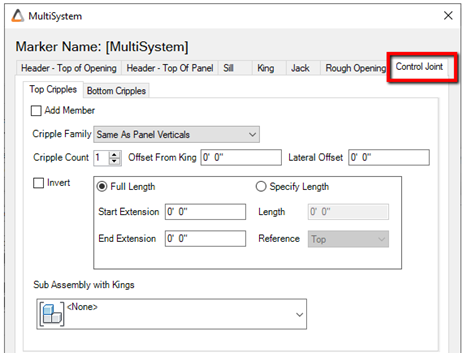
5. Adding Control Joint Support to MultiSystem Marker
A new option is now available on MultiSystem Marker. On Control Joint tab, the user can add extra top and bottom Cripples, having also the ability to control their count, offset, length and extensions. They also can be added to a subassembly. Available in all metal products – MWF Pro Metal, MWF Advanced Metal and MWF Pro Suite.
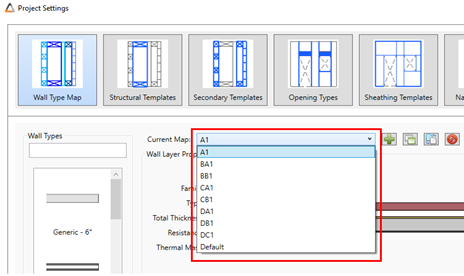
6. MultiLayer Walls – Wall Type Maps are now in alphabetical order
After creating several Wall Type Maps, they will be automatically ordered alphabetically. The list is located on Multilayer Project Settings. Available in all MWF products.
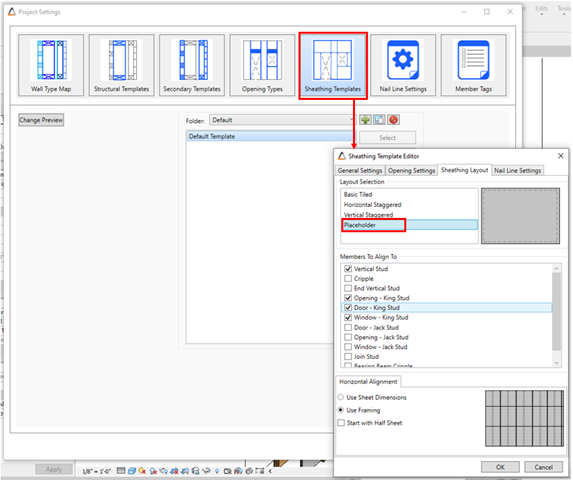
7. Multilayer Walls – Option to Place a Single Sheathing Placeholder
The user now has the option of applying one single sheathing board on the panel. This option is located on the Sheathing Template Editor, on MultiLayer Walls Settings. Available in all MWF products.
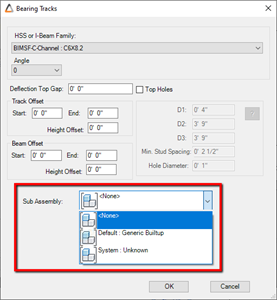
8. Creating a Subassembly for Bearing Tracks
Bearing Tracks have now the option of being created as subassemblies. The user can assign a subassembly catalog directly on the Bearing Beam dialog box, located on Walls Properties. Available in all MWF products.
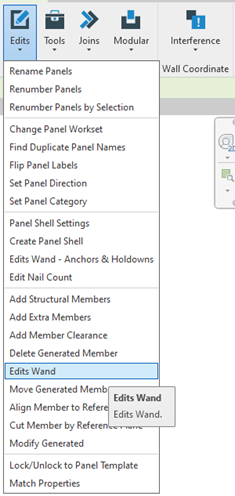
9. Edits Wand
This new command allows the user to modify panels with regular Revit commands. When using Edits Wand command, any modification made to the panel through a Revit command (copy, move, delete) will be saved to that panel even after regeneration. Available in all MWF products.
MWF Shop Drawings
Please note:
This version (3) of shop drawings will be closing and version 4 will be on the next public release.

The user will now be able to setup and generate shop drawings for Multilayer and Standard walls using the same tool. The new tool is located on the Wall MultiLayer Menu. Available in all MWF products.
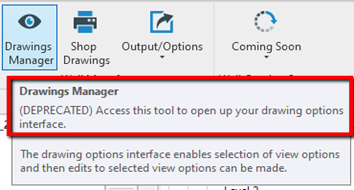
Shop Drawings (V1) will have the following warning added to it’s description:
Drawing Settings
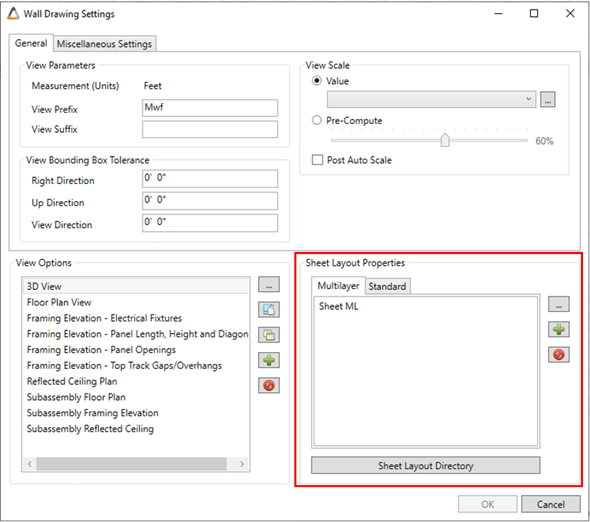
On the settings dialog box, the user will have the ability to create sheets for MultiLayer and Standard Walls using the two tabs available under Sheet Layout Properties. All the views created under Views Options can be added to either a Multilayer Sheet or to a Standard Sheet. Available in all MWF products.
1. Sheet Properties
The following new features are found on the Sheet Properties dialog box, Available in all MWF products:
- Implemented Sheet Numbering By Panel Positioning Name:
In the Sheet Properties, when “By Panel Positioning” is selected for Sheet Numbering Method, the panel positioning number can be used as the sheet number.
- Implemented Add Positioning Count to sheet name:
When checking off “Add Panel Positioning Count”, the panel positioning count will be added to the sheet name.
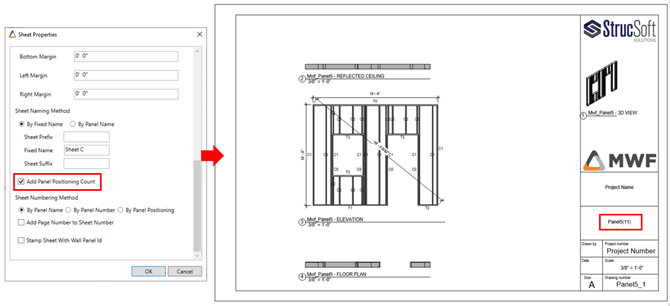
- Implemented Add Page Number to Sheet Number:
When using this option, the page number will be added between brackets after the sheet number. In this example, the sheet numbering method is By Panel Name: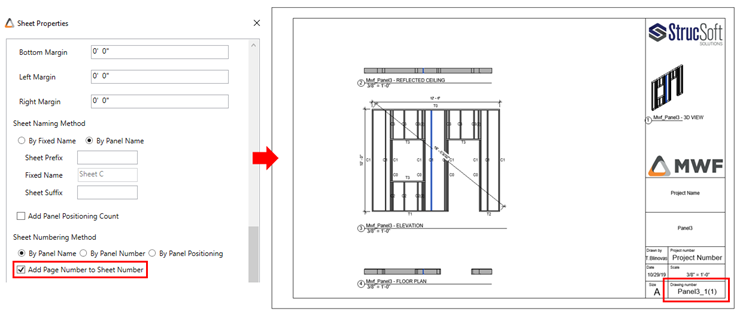
- Ability to stamp sheet with ID:
The user can choose to stamp the sheet with the wall panel ID. The ID will be located at the bottom left corner of the sheet.
2. View Options
The following new features can be found on the View Options, available in all MWF products:
- Implemented Show Panel Label
When selecting the option Show Panel Label, Shop Drawings will generate a sheet for the drawings and a separate panel label sheet. This option is located on the View Settings and it’s available for Elevation View, 3D View, Assembly Elevation, Foam Elevation and Sub Assembly Panel Elevation views.
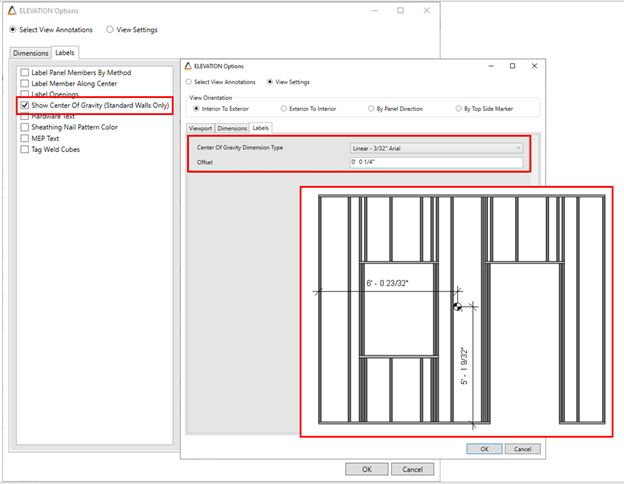
- Implemented Show Center of Gravity:
On the Labels tab, users have now the option to show the center of gravity of the panel on the Elevation View (Standard Walls only):
- Convert Custom BOM into a Revit® Schedule:
Give the user the possibility to convert BOM into a Revit Schedule as it was on the previous Standard Shop Drawing Engine: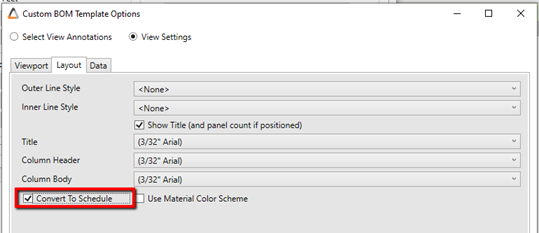
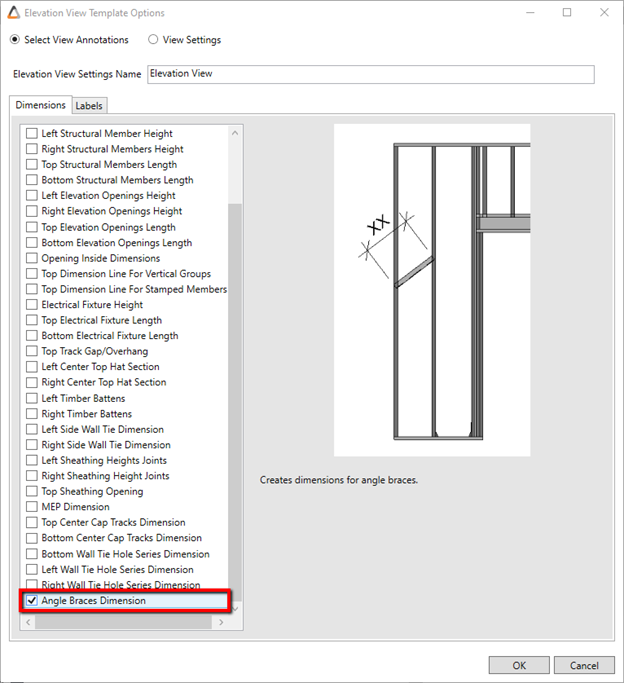
- Angle Braces dimensions available on Shop Drawings V2:
There will be a new option on Elevation View to dimension Angle Braces:
MWF Floors
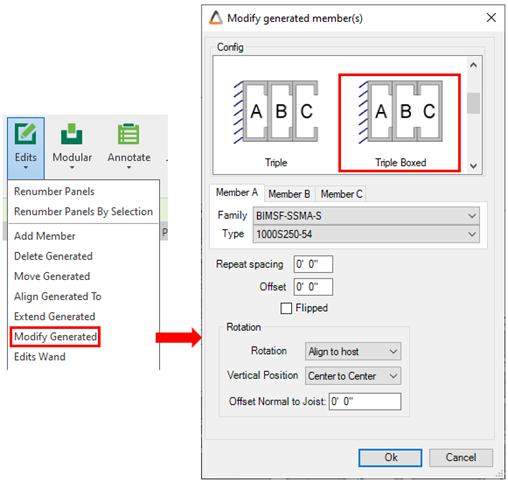
1. Modify Generated – New ‘Triple Boxed’ member configuration
Under Edits drop down menu, on Modify Generated, the user has now a Triple Boxed configuration option for floor members. Available in all metal products – MWF Pro Metal, MWF Advanced Metal and MWF Pro Suite.
2. Floor Opening Marker Subassembly Grouping
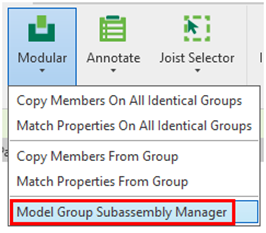 It allows the grouping of elements (joists) inside a Revit Model Group as a subassembly. Available in all MWF products, the User will have the ability to manage the subassemblies with tools that should:
- Stamp elements with the subassembly parameter.
- Add / Remove elements to a subassembly selection.
- Delete the subassembly information from the members
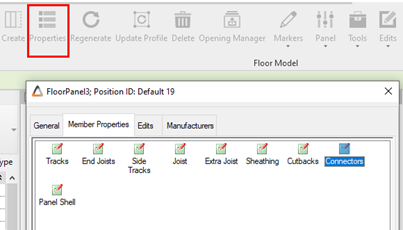
3. Ability to place BH hangers
The user can now load place BH hangers on the panels. The connector Features Settings is located on the Member Properties tab, on Properties. Available in all metal products – MWF Pro Metal, MWF Advanced Metal and MWF Pro Suite.

To test it out yourself, download the latest version of MWF from your portal page.
For more information on our products or services, visit strucsoftsolutions.com, email us at info@strucsoftsolutions.com or call us at 514-538-6862.