What’s New in MWF for Revit 2023
The Summer of 2022 brings with it many positive developments for StrucSoft Solutions | Graitec Group.
For one—we relaunched our website with an updated look and smoother browsing experience.
We’ve gone through a similar visual rebranding on our social media channels including LinkedIn, Facebook and Twitter.
We’re also excited to share a brand new release to our core MWF (Metal Wood Framer) product line (Version 2.39, Build 8221), now compatible with Revit 2023. Head over to your client portal to try the new build out!
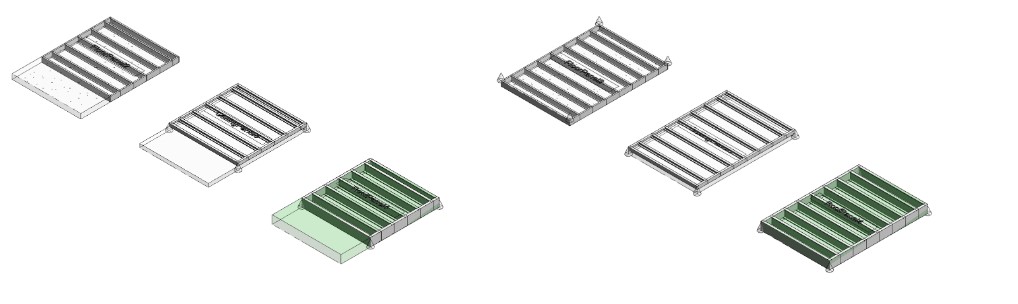
Walls and Floors
- Improved user interface.
- Automatically create openings around curtain walls.
- Opening marker creation has been streamlined.
- Ability to add more members to H-Stud packs.
- New options for Sill track and Header track opening markers.
- Create template maps for floors, roofs and ceilings.
- Modify specific studs in floor joists.
- Update profiles for roofs, floors and ceilings.
- New floor module menu.
Multilayer
- Horizontally tiled and staggered layouts.
- Specify sheathing start.
- ‘Break at Bounds’ optimization.
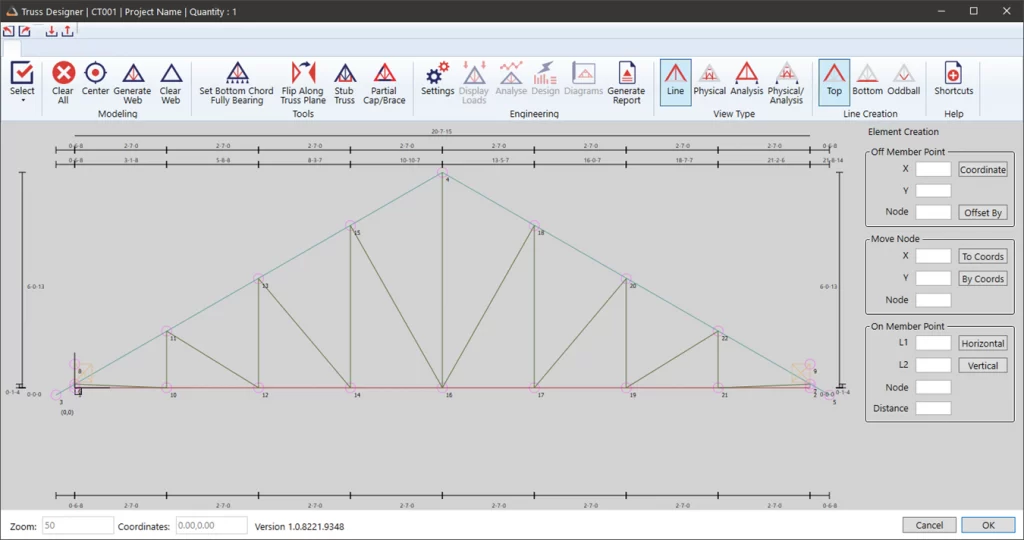
Trusses
- Improved user interface.
- Single node webbing.
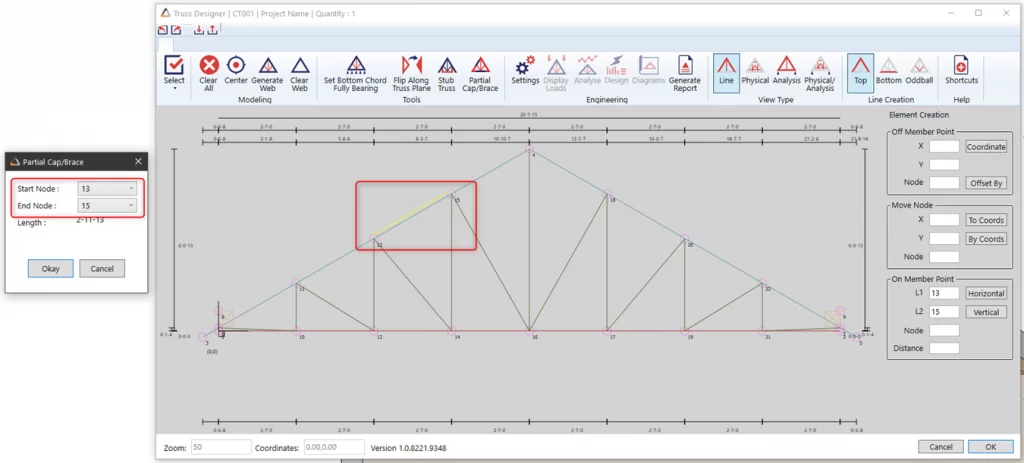
- Partial Chord bracing.
Walls and Floors
Improved user interface
![]()
![]()

We’ve redesigned menu icons to better indicate each tool’s functionality, while making it easier for you to select the right tool quickly. Also added are new tooltips concisely describing what each tool does.
Automatic creation of openings around curtain walls
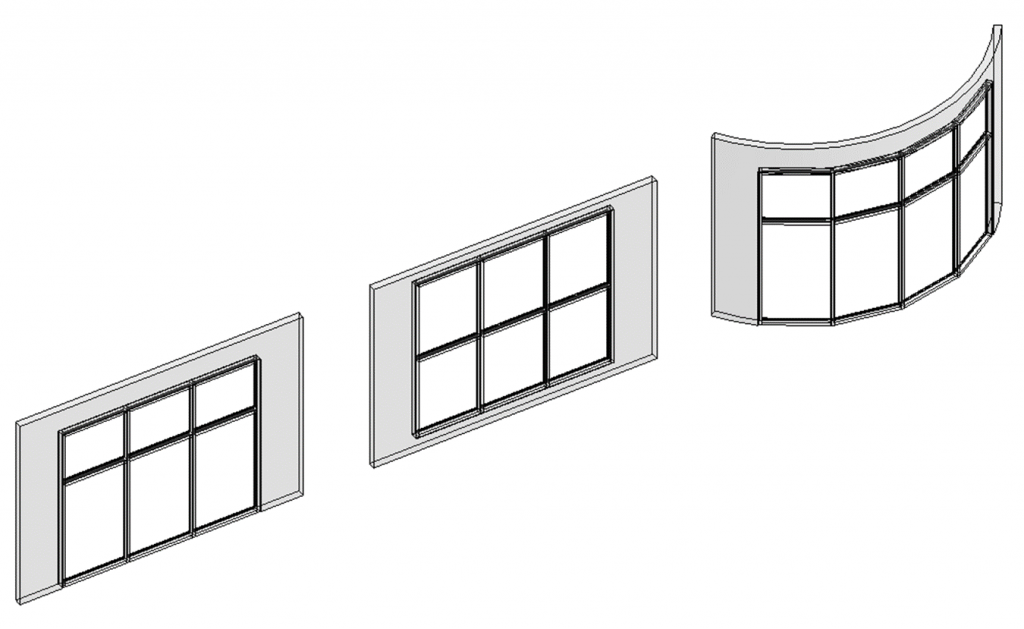
Previously users had to manually create openings after detecting curtain wall clashes.
In order to increase workflow efficiency, MWF’s built-in clash detection tool now recognizes curtain wall clashes and allows you to automatically create an opening in the correct position.
This functionality can be enabled by going into the curtain wall’s ‘Type Properties’ menu and ensuring the ‘automatically embed’ property has been checked.
Similar to curtain walls, it is now possible to create openings around curved walls. After selecting the clash detection tool, in the ‘cut opening tolerance’ menu, select ‘arced walls’ option.
Opening marker creation has been streamlined
Instead of manually creating markers around the position of the opening, you can now specify the opening marker types that you want to apply before running your clash detection.
After you have selected the elements to run the clash detection tool on, in the ‘cut opening tolerance’ menu, you can choose an opening marker type from the dropdown menu.
Ability to add extra members to H-Stud packs.
Users can now add up to 4 members to their H-studs. Once you have created H-stud markers on your panel, in the ‘Marker Manager’ menu, go to the ‘wall’ tab and select your H stud pack.
In the H stud pack menu, you can now select up to 4 members to be added to the stud pack.
*Best practice – do not override an existing stud, instead duplicate it to create new types!
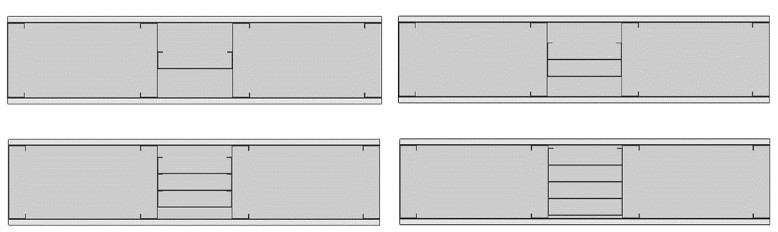
New options for Sill track and Header track opening markers
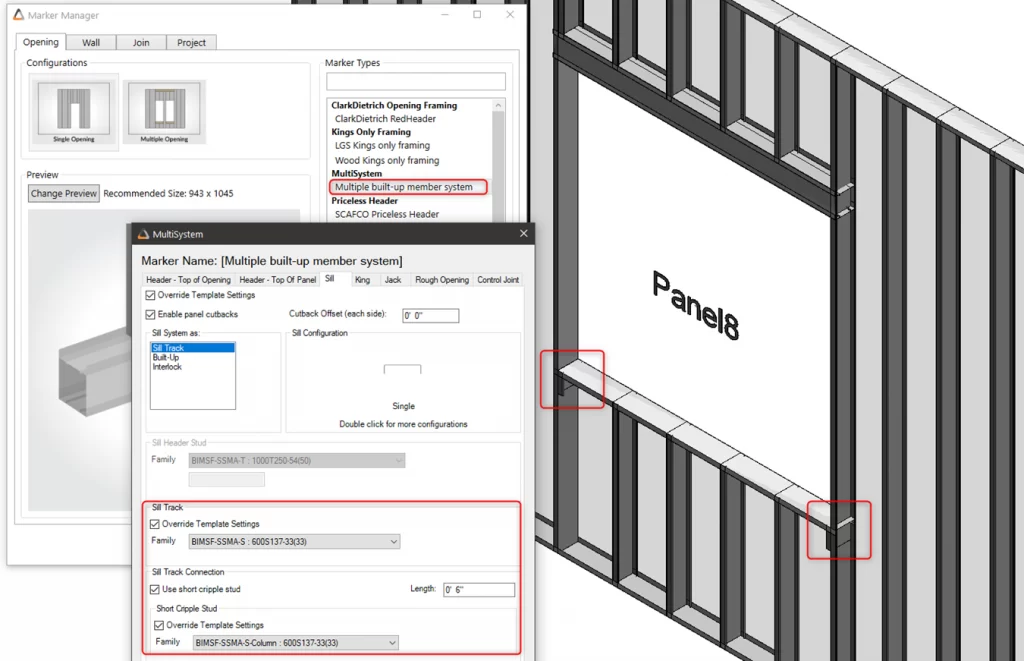
Users have access to newer options such as – sill track, sill track connection, Op angle and Subassembly for their sill track and header track opening markers.
- Go to ‘marker manager’ > ‘Multisystem marker’ under ‘sill’ tab. You will notice the option to ‘Override template settings’ allowing you to use different sill track family members than those available in the original template.
- In the sill track connection setting, you can choose to use short cripple studs, define their length, and choose their corresponding family member.
- The op angle setting allows you to place a clip at the position of the short cripple.
- The last option in the list allows you to create a SubAssembly for your sill track members.
Create template maps for floors, roofs and ceilings
With this much awaited improvement users can now create Template Maps for floors, roofs and ceilings.

In the ‘Template Manager’ menu, select the category you wish to create template maps for. Select the appropriate floor, ceiling or roof type, and the corresponding template you would like to apply.
You can now choose to frame these right away, or regenerate them later.
Modify specific studs in floor joists
You can now add extra members to your floor joists. Click on a floor member, go to Properties. Select the ‘extra joist’ option. In the ‘Repeat/Modify’ tab you are able to make changes to specific studs.
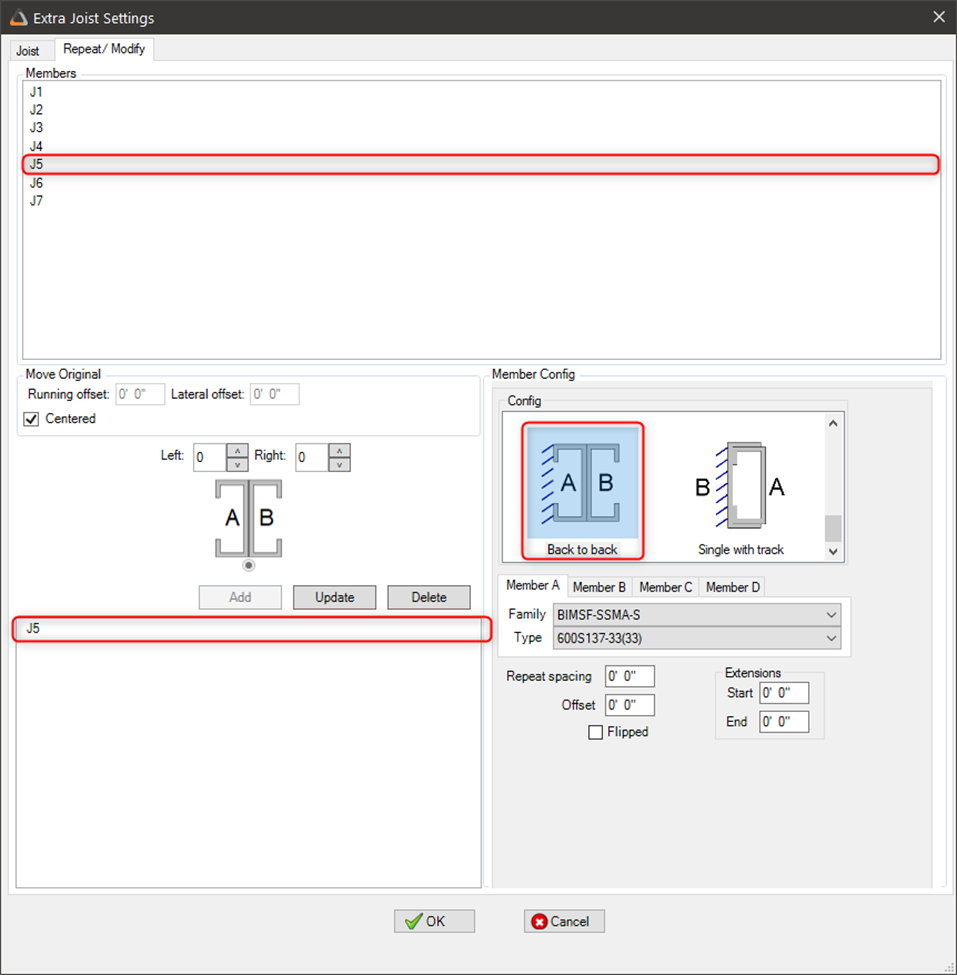
After choosing the joists you would like to modify or repeat, you can find options to add extra members to the left or right, change their positioning by adding a horizontal or vertical offset, and center them.
You can also choose various configurations for joists, such as double, triple boxed, face-to-face and more.
Update profiles for floors, roofs and ceilings.
Users can now update profiles for roofs and ceilings in addition to floors.
Having to remodel your elements by changing their profiles or shapes across the model can be time consuming.
With the recent update you can update profiles not only for floors but roofs and ceilings too, and save a lot of time in the process.
In the ‘Filters’ menu, select the floor, roof or ceiling, click on ‘Edit boundary, profile or footprint’, make the desired change and click ‘Update Profile’. Once you are satisfied with the changes, simply click on ‘Regenerate’ to create the updated element.
New floor module menu
We’ve included a new ribbon menu displaying a list of quick access tools to speed up your workflows.
In the floor module, click on the ‘Selection’ button to bring a list of options such as ‘select non-framed floors’, ‘Show or Hide all Panels in Current View’ , ‘Isolate Panels’ and more
Multilayer
Horizontally tiled and staggered layouts
Users can now have a horizontally tiled as well as a horizontally staggered sheathing layouts. Select your layout in the ‘Sheathing Template Editor’.
Specify the start point of your sheathing layout
We’ve added five new options to help you determine the start of the sheathing layout: at the panel start, end, at start and end, at panel direction, or at center bay.
Added the “Break at Bounds” sheathing optimization
This feature allows you to choose whether you would like to automatically break sheathing at openings instead of manually doing so. In the ‘Sheathing template editor’ ensure the ‘Break Sheathing Panels At Opening Bounds’ box is checked.
Trusses
Improved interface
In conjunction with walls and floors, the truss module interface has been improved with revamped icons and tooltips.
Tag manually added lines
Manually added lines in truss envelopes can be tagged as Top Chord, Bottom Chord or Heel, making it easier to add Auto truss connections.
Single node webbing
You can now create trusses where the webbing will connect at the same point along the top and bottom chord, for specific sections member that members are bolted at a single point
Partial Chord Bracing; users can now add an extra member along a portion of the top and/or bottom chord as a brace or a cap to add rigidity to the truss
The “development length” has been added for calculating braced and/or capped members
For more information on our products or design services, visit strucsoftsolutions.com, email us at info@strucSoftsolutions.com or call us at 514-538-6862
 StrucSoft Solutions| Graitec Group is the market leader in comprehensive Autodesk® Revit®-based BIM framing, with both off-the-shelf and custom solutions targeting the AEC and fabrication sectors. Our star solution MWF simplifies complex Revit® framing with its powerful range of tools for modeling, inter-trade clash detection, custom construction documentation and optional output to CNC machines.