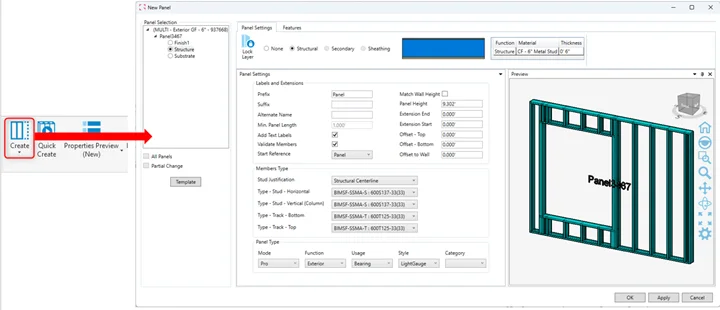
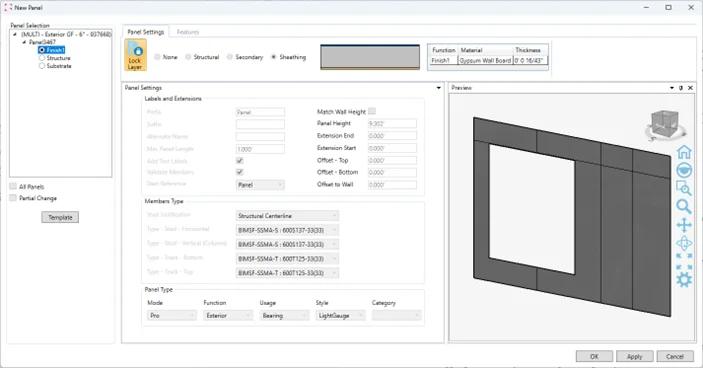
Modify Structural Templates directly from the Multilayer Template Map.
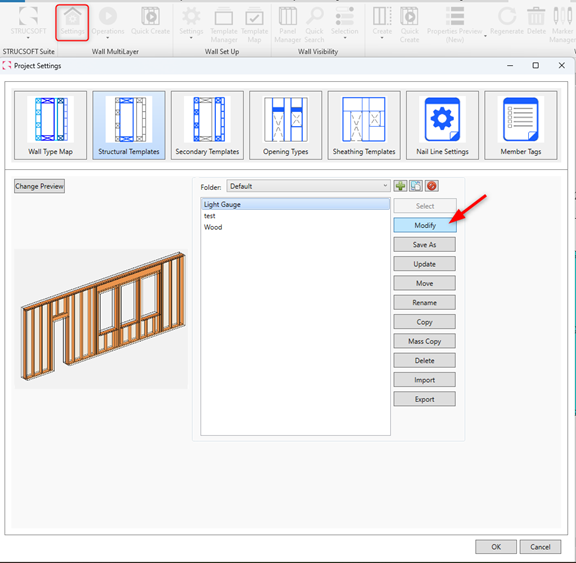
When clicking in Modify, the new Properties with Preview window will open. You can modify any features and update your template from this window, without the need to select a real panel in the project.
This update will make template creation and update easier and following the same principles of the Secondary and Sheathing templates.
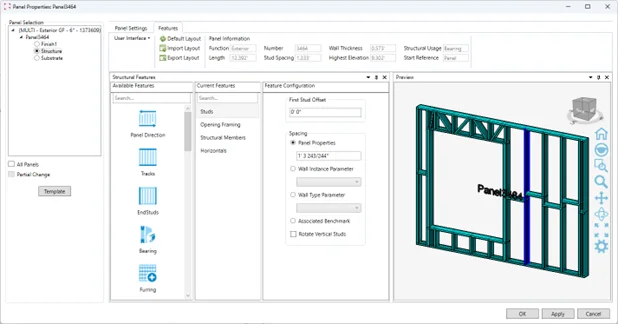
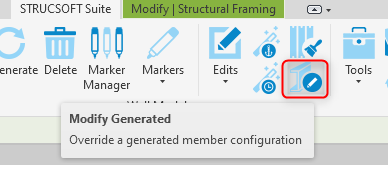
You can now move, add new members and/or add extensions without the need to regenerate the panel.
A warning will be prompted asking users if they wish to regenerate the panel or not.
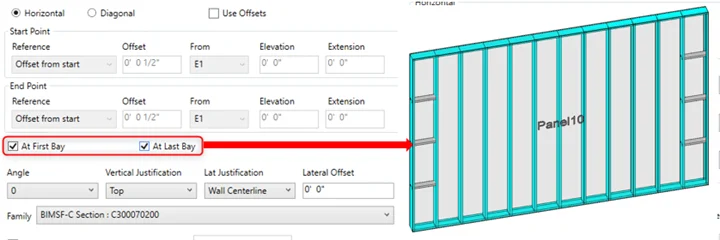
Please keep in mind that if there is any blocking in the panel, the horizontal member will only be updated if panel is regenerated.
New option in Horizontals to add blocking/horizontal members to only first and/or last bay of your panel. The settings can be saved in your template.
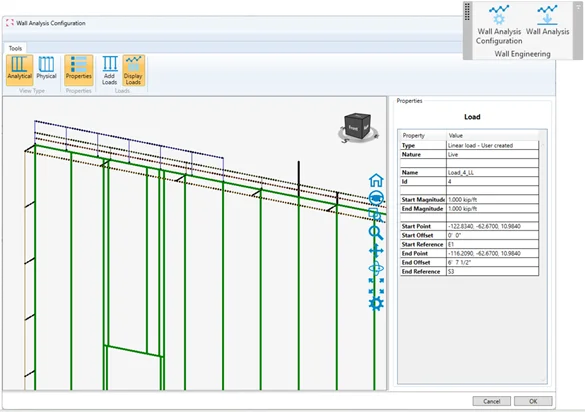
The Wall Analysis feature introduces the first step toward comprehensive design and analysis of wall panels within MWF. It allows users to:
- Add Loads: Apply various load types, including live load, dead load, partial load, and wind load.
- Visualize Analysis Lines: See analysis lines generated by MWF for better insight into structural performance.
- Integration with Advanced Design: When running Wall Analysis, data is seamlessly transferred to Advanced Design for detailed calculations.
Note: Advanced Design must be installed to finalize wall analysis.
Currently, this feature supports simple panels for both wood and light gauge steel (LGS) without built-up sections.
The next phase will expand capabilities to handle complex panels, including built-up sections and bearing beams/headers.
A live preview is now available for Default Opening Markers (Wood and LGS) and Truss Header Symmetrical V (LGS only).
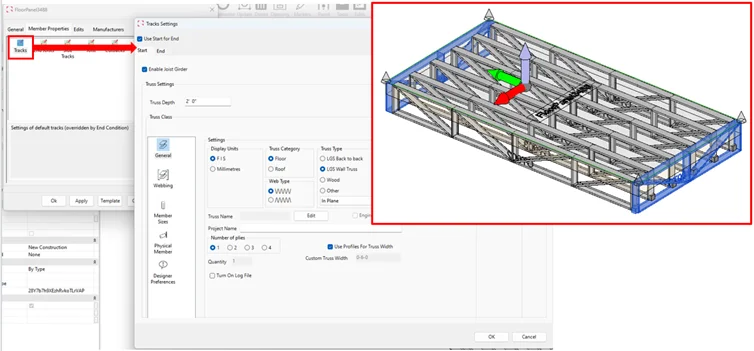
New updates will enable users to automatically generate perpendicular floor trusses (Track Trusses) along the edges of a floor panel, following the floor profile where rim tracks would normally be placed. This enhancement ensures that floor truss panels include both joist trusses and track trusses, improving structural accuracy and customization.
New and renewing customers will now receive a network cloud-based floating license. This license is automatically released when the user closes Revit, allowing it to be activated on another machine without requiring manual release or deactivation.
- LICENSES ACTIVATION PROCEDURE
For new or existing customers using the following Builds:
- 9116 (Revit 2024/2025)
- 9253 (Revit 2024/2025)
- 9370 (Revit 2024/2025/2026) OR NEWER
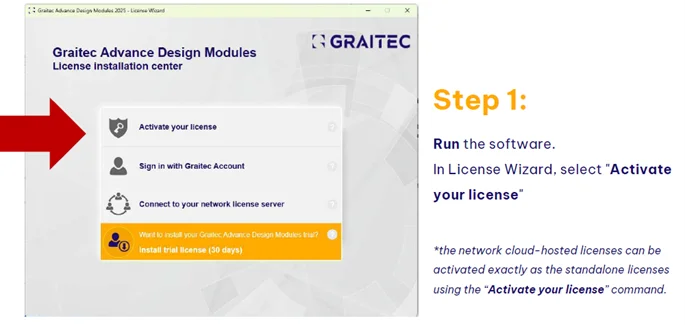
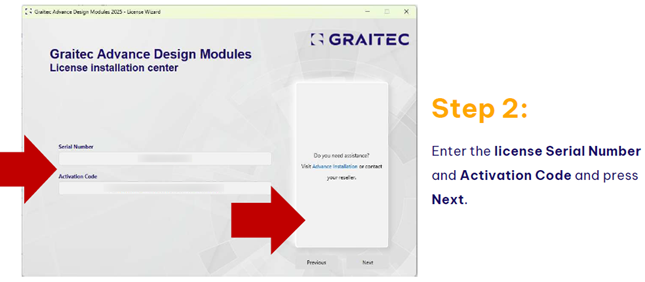
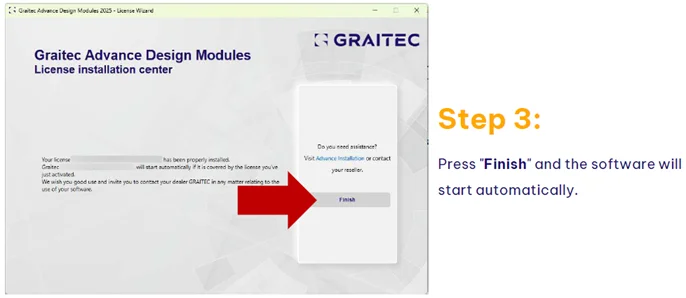
IMPORTANT: When upgrading to a new Strucsoft Build/Version, there is no need to activate your license again. After installing the new build, simply open Revit, click on any Strucsoft command and license will be activated. If you are prompted to activate your license again, follow Steps 1 to 3 above.
2. LICENSES PATCH PROCEDURE
For Customer using the following Builds:
- 8560 (Revit 2024)
- 8675 (Revit 2024)
- 8740 (Revit 2024)
- 8844 (Revit 2024)
- 9020 (Revit 2024)
- Install Licensing Patch provided (do not uninstall the Strucsoft Build). If License Patch has not been provided, please contact our Technical Support at [email protected]
- Open Revit
- Use any command on the Strucsoft Ribbon
- If License Wizard is prompted, please follow the usual steps to activate your license (Refer to Steps 1 to 3 from Section I, License Activation Procedure).
For Customer using the following Builds:
- 9021 (Revit 2025)
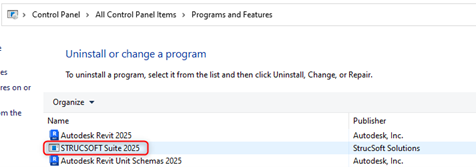
Perform a Clean Uninstall following these steps:
- Uninstall Strucsoft plug-in
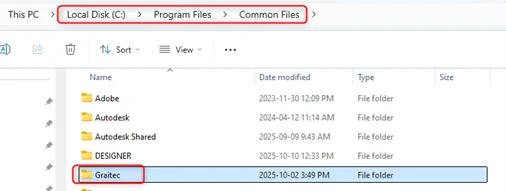
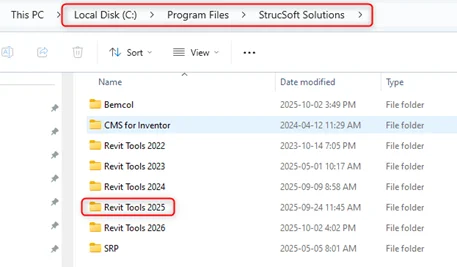
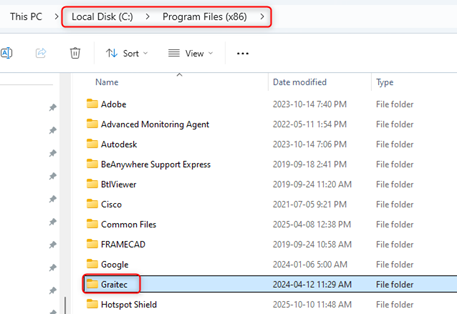
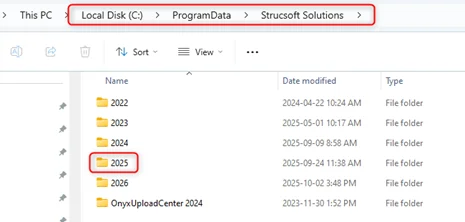
- Delete the following folders from C drive:
- Install the Hotfix for Build 9021 provided by Graitec. If it has not been sent to you, please contact our Technical Support at [email protected] ).
- Open Revit and follow Steps 1 to 3 from Section I of this document (License Activation Procedure).
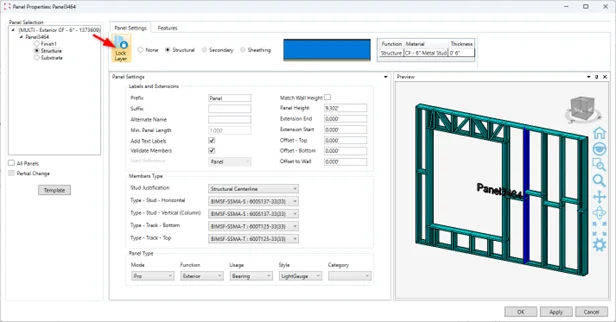
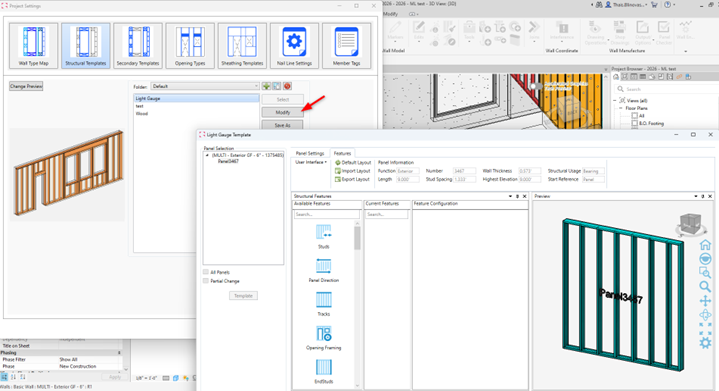
Modify Structural Templates directly from the Multilayer Template Map.
When clicking in Modify, the new Properties with Preview window will open. You can modify any features and update your template from this window, without the need to select a real panel in the project.
This update will make template creation and update easier and following the same principles of the Secondary and Sheathing templates.